pg. 2:1 Body and interior |
Body and interior
The seats, doors, sun roof, mirrors, etc. are described on the following pages.
| 2:2 | Keys |
| 2:3 | Doors and Locks |
| 2:4 | Front seats |
| 2:5 | Rear-view/side-view mirrors |
| 2:6 | Sun roof |
| 2:7 | Child safety locks, Trunk lid (sedan) |
| 2:8 | Storage spaces |
| 2:9 | Interior light, Hood |
| 2:10 | Trunk, long load storage |
| 2:11 | Tailgate/child safety lock (wagon) |
| 2:12 | Storage spaces (wagon) |
| 2:13 | Folding rear seat (wagon) |
| 2:14 | Removing seat cushions, Securing cargo |
| 2:15 | Cargo space lighting, spare tire, jack (wagon) |

Number tag
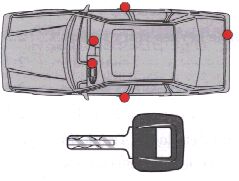
The key number codes are stamped on a separate tag supplied with the keys. This tag should be separated from the key ring and kept in a safe place.
The back of the tag is coated with adhesive tape. In the event of the original keys are lost, duplicates may be ordered from your Volvo dealer. The central locking system is described in detail in section Doors and locks.
Door locks
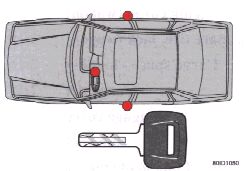
The vehicle is equipped with a central locking system. This means the lock on the driver's door controls the locks on the other doors (including the trunk or tailgate) automatically.
If the driver's door is locked or unlocked from the outside using the key, the other doors will be locked or unlocked automatically.
To lock/unlock the car by using the lock button on the inside of the driver's door, push/pull to lock/unlock all the doors. Check the action of the buttons on the other doors to verify their correct function (lock/unlock). The driver's door can be locked only by using the key when outside the vehicle.
WARNING!
|
To avoid battery drain
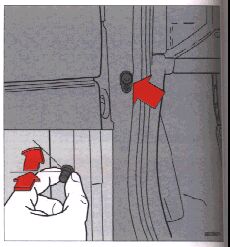
The interior light and the warning lights in the rear of the doors come on when a door is opened.
To avoid battery drain when the doors are opened for prolonged periods, these lights can be switched off by pushing in and turning the door light switches slightly clockwise. When the door is closed the switch will return to its normal position.
Height adjustment (manual)
The front section of the driver's seat can be adjusted to three height positions and the rear section to four.
Lever forward = front height adjustment
Lever rearward = rear height adjustment
Do not adjust the seat while driving.
The front and rear sections of the passenger's seat can each be adjusted to two positions. Suitable tools must be used to carry out the adjustments.
Fore-aft seat adjustment (manual)
Pull control upward, then slide seat forward or rearward to desired position.
Make sure that the seat is properly secured when you release the control.
Seat back inclination adjustment (manual)
Rotate control clockwise to tilt seat back rearward.
Rotate counterclockwise to tilt seat back forward.
Note that body weight must be shifted to allow seat back to move forward or rearward.
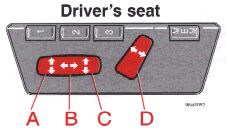
Electrically operated driver's seats (certain models)
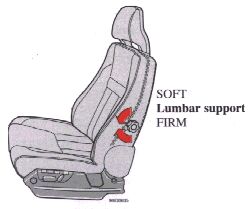
A Seat front ( raise/lower )
B Forward - rearward
C Seat rear ( raise/lower )
D Backrest tilt
WARNING! Do not adjust the seat while driving. The seat should be adjusted so that the brake pedal can be depressed fully. In addition, position the seat as far rearward as comfort and control allow. The seat rails on the floor must not be obstructed in any way when the seat is moved. |
WARNING! The driver's seat is operable with the ignition OFF.
|
Movement of the driver's seat can be STOPPED at any time by pressing any button on the seat's control panel.
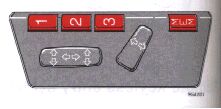
Programming the memory
Three seat positions can be programmed. To program a seat position:
1. Adjust the seat to the desired position.
2. Depress the MEM button.
3. Press button 1 to program the current position of the seat.
Buttons 2 and 3 can be programmed in the same way for two additional seat positions. To move the seat to a programmed position, depress button 1, 2 or 3 until the seat stops. If the button is released before the seat has the reached the programmed position, it will stop as a safety precaution.
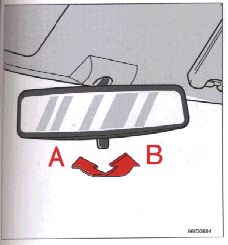
Rear-view mirror
A
Normal position
B
Night position, reduces glare from following headlights
CAUTION: Never use ice scrapers made of metal as they can easily scratch the mirror surface. |
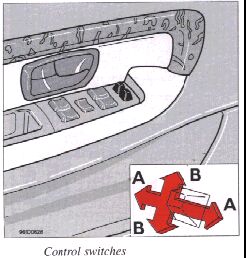
Electrically-operated side-view mirrors
The control switches are located in the driver's door armrest.
A
Adjustment sideways
B
Adjustment up/down
WARNING! Objects seen in the wide-angle right side-view mirror are closer than they appear to be.
|
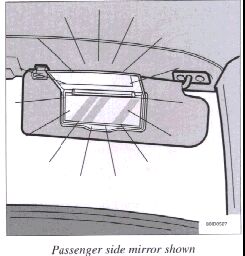
Vanity mirrors
The vanity mirrors are located on both front sun visors (certain models).
The lamps light up when the covers are opened.