

pg. 6:1 In case of an emergency |
In case of emergency
Even if you maintain your car in good running condition, there is always the possibility that something might go wrong and prevent you from driving, such as a punctured tire, blown fuse or bulb, etc.. For additional information, see section "ON CALL Road Assistance".
| 6:2 | Changing a wheel |
| 6:4 | Temporary spare tire |
| 6:5 | Replacing bulbs |
| 6:13 | Replacing fuses |
| 6:17 | Replacing wiper blades |
| 6:18 | Troubleshooting |


Changing a wheel
On sedans the spare wheel, jack and toolbag are located in the trunk, beneath the carpet. The jack must be completely retracted to fit into the holder.
On wagons, the spare tire and the jack are located beneath the floor mat in the large storage bin. Always secure the spare tire and the jack to prevent them from rattling.
NOTE:
The crank handle on the jack can be folded out by pressing the nob on the handle downward.
To attach the jack, refer to the illustration on the following page.
NOTE:
To avoid excessive wear and the necessity of rebalancing, mark and reinstall wheels in same location and position as before removal. To lessen the chance of imbalance, each wheel hub is equipped with a guide stud to ensure that a removed wheel can be reinstalled in its original position (as when changing over to winter tires/wheels).
pg. 6:3 Wheel changing |

Attaching the jack
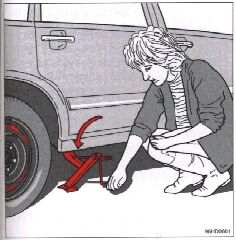
There is a jack attachment adjacent to each wheel location. Position the jack on the bar in the jack attachment as shown in the illustration above and crank while simultaneously guiding the base to the ground. The base of the jack must be flat on a level, firm, non-slippery surface.
Before raising the car check that the jack is still correctly positioned in the attachment
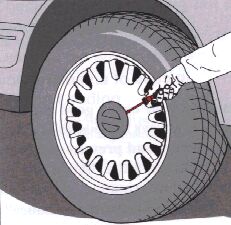
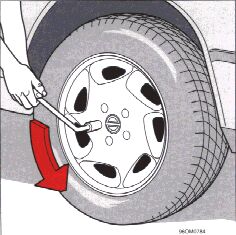
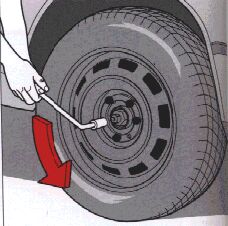
. Now raise the vehicle until the wheel is free of the ground. Unscrew the wheel nuts completely and carefully remove the wheel so as not to damage the tread of the studs.


WARNING! |
Installing the wheel
Clean the contact surfaces on the wheel and hub. Lift the wheel and place it on the hub. Make sure that you align the wheel with the guide stud on the wheel hub prior to installation. Install the wheel nuts crosswise and tighten lightly. The conical side of the nuts should face the wheel. Lower the vehicle to the ground and alternately tighten the nuts to 63 lbs. (85 Nm). Install the wheel cap.


WARNING!
|
Temporary Spare (certain models)
The spare tire of your car is what is called a "Temporary Spare". This is embossed on the tire. See illustration.
Recommended tire pressure (see decal) should be maintained irrespective of which position of the car the Temporary Spare tire is used on. In the event of damage to this tire a new one can be purchased from your Volvo retailer.