
Replacing bulbs
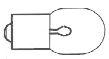
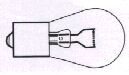
Make sure when installing bulbs, that the guide pin on the socket fits into its corresponding recess. When installing Halogen bulbs, do not touch the glass with your fingers because grease, oil or any other impurities can be carbonized onto the bulb and damage the reflector. Use bulbs of correct type and voltage. Failure to do so could cause the bulb failure warning light to activate.
NOTE: Turn the ignition and the light switch off before replacing any bulbs.
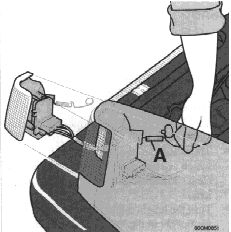
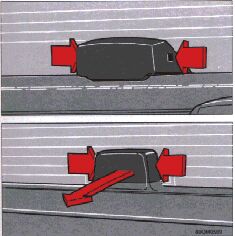
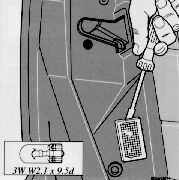
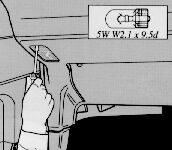
Parking light/direction indicator
1. Loosen the spring which retains the lamp housing.
2. Withdraw the entire lamp housing; separate the bulb holder from the lamp unit.
3. Leave the connector with its wires in the bulb holder.
4. Remove the bulb from the holder by pressing in and turning counter-clockwise.
5. Insert a new bulb and reinstall the unit in the reverse order.
pg. 6:6 Replacing bulbs |
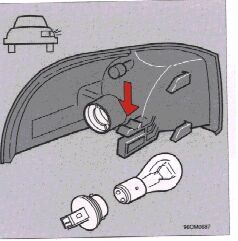
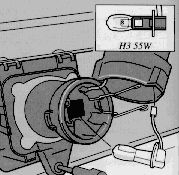
Headlight bulb replacement
1. Turn the plastic cover counter-clockwise and remove it.
2. Turn the bulb and connector (one unit) 1/4 turn counter-clockwise and remove.
3. Disconnect the wiring from the bulb unit.
4. Connect a new bulb unit into the wiring without touching the bulb itself.
5. Re-insert the bulb into the headlight housing and turn 1/4 turn clockwise until the unit seats properly. The unit has three guide lugs to ensure proper seating.
6. Reinstall the plastic cover.
Headlight adjustment
The height of the headlight beams can be adjusted according to vehicle load. The headlights should be re-aimed if heavy loads are carried in the trunk/cargo area or rear seat, or when towing a trailer.
To adjust the headlights:
Lateral headlight adjustment should only be carried out by an authorized Volvo retailer. The lateral adjustment scale (B) should be preset to "0".
pg. 6:7 Replacing bulbs, Sedans |
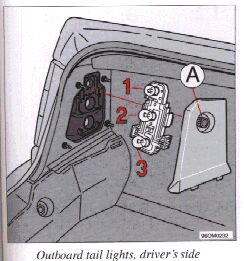
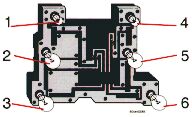
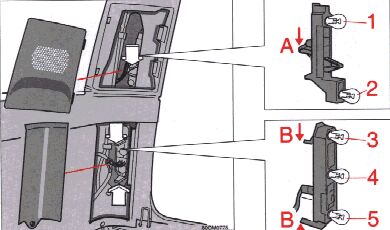
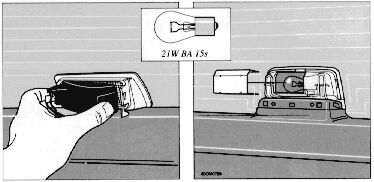
Tail light bulbs (sedans)
1. Tail light
2. Direction indicator
3. Brake light
4. Tail light
5. Back-up light
6. Rear fog light (left side only)
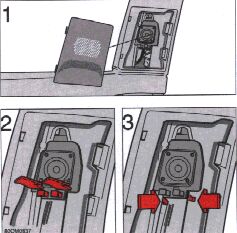
All the bulbs in the tail light unit are replaced from inside the trunk as follows:
1. Turn the two plastic screws and open the cover over the rear lamp unit.
2. Loosen and remove the bulb holder.
3. Let the connector with its wires remain attached to the bulb holder.
4. Remove the bulb by pressing in and turning counter-clockwise.
5. Insert a new bulb into the holder and reinstall the holder into the tail light assembly.
6. Close the cover.
pg. 6:8 Replacing bulbs |
Tail light bulbs (wagons)
1. Direction indicator
2. Brake light
3. Tail light
4. Back-up light
5. Tail light / Rear fog light (left side only)
All the bulbs in the tail light unit are replaced from inside the cargo space as follows:
pg. 6:9 Replacing bulbs |
High-mounted brake light
Sedans:
Wagons:
pg. 6:10 Replacing bulbs |
Brake lights mounted in spoiler (certain models)
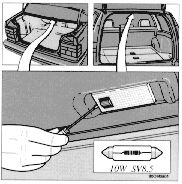
Trunk light (sedans)/Rear courtesy light (wagons)
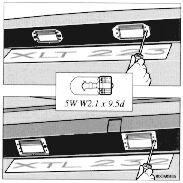
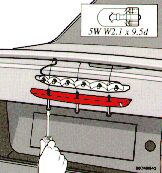
License plate lights (sedans and wagons)
pg. 6:11 Replacing bulbs |
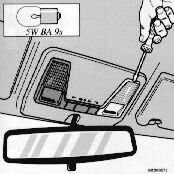
Front courtesy lights
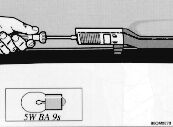
Rear reading lights
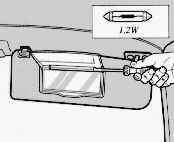
Vanity mirror
pg. 6:12 Replacing bulbs |
Door warning lights
Front
Rear
Door step courtesy lights
NOTE: Other bulbs may be difficult for the owner to replace. Let your Volvo retailer replace these bulbs if necessary.
Front fog lights (option)