| Body and interior |
| pg. 2:1 Body and interior |
Body and interior
The seats, doors, sun roof, mirrors, etc. are described on the following pages.
| 2:2 | Keys, Doors and Locks |
| 2:3 | Remote keyless entry system |
| 2:4 | Front seats |
| 2:5 | Rear/side view mirrors, Vanity mirror |
| 2:6 | Interior light, Rear reading lights |
| 2:7 | Child safety locks, Trunk lid |
| 2:8 | Passenger compartment storage spaces |
| 2:9 | Hood |
| 2:10 | Trunk light, spare tire, jack (sedan) |
| 2:11 | Station wagon tailgate/child safety lock |
| 2:12 | Concealed storage bins, Folding rear seat (wagon) |
| 2:14 | Removing seat cushions, Securing cargo (wagon) |
| 2:15 | Cargo space lighting, spare tire, jack (wagon) |
| 2:16 | Sun roof |
| pg. 2:2 Keys, Doors and Locks |

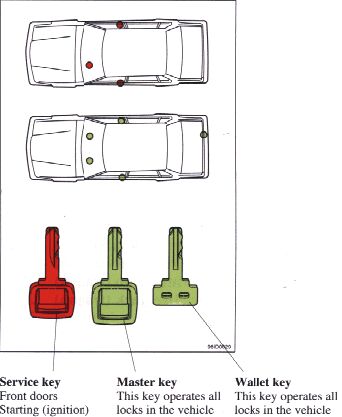
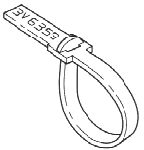
Number tag
| pg. 2:3 Doors and locks |
Doors locks
The vehicle is equipped with a central door-locking system. This means the lock on the driver's door controls the locks on the other doors (including the trunk or, on wagon models, the tailgate) automatically.
If the driver's door is locked or unlocked from the outside using the key, the other doors will be locked or unlocked automatically.
To lock/unlock the car by using the lock button on the inside of the driver's door, push/pull to lock/unlock all the doors. Check the action of the buttons on the other doors to verify their correct function (lock/unlock). The driver's door can be locked only by using the key when outside the vehicle.
WARNING!
|
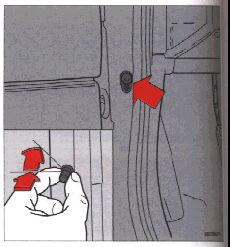
To avoid battery drain
The interior light and the warning lights in the rear of the doors come on when a door is opened.
To avoid battery drain when the doors are opened for prolonged periods, these lights can be switched off by pushing in and turning the door light switches slightly clockwise. When the door is closed the switch will return to its normal position.
| pg. 2:4 Front seats |
Electrically operated front seats
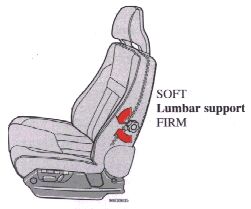
The front seats are electrically operated. Using the switches on the sides of the seats you can adjust:
- the height of the seat (rear)
- the height of the seat (front)
- the forward-backward movement
- the backrest tilt
| NOTE: The electrically operated front seats have an overload protector which engages if an object blocks either of the seats. If this happens remove the object and wait 20 seconds. The overload protector should then have cooled down and the power seats should function normally. |
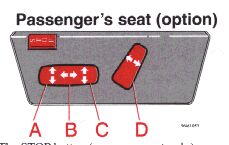
WARNING! Do not adjust the seat while driving. The seat should be adjusted so that the brake pedal can be depressed fully. In addition, position the seat as far rearward as comfort and control allow. The seat rails on the floor must not be obstructed in any way when the seat is moved. |
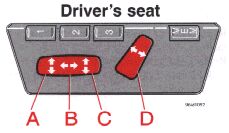
WARNING!
The driver's seat is operable with the ignition OFF.
|
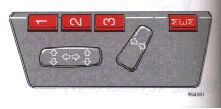
Programming the memory
Three seat positions can be programmed. To program a seat position:
1. Adjust the seat to the desired position.
2. Depress the MEM button.
3. Press button 1 to program the current position of the seat.
Buttons 2 and 3 can be programmed in the same way for two additional seat positions. To move the seat to a programmed position, depress button 1, 2 or 3 until the seat stops. If the button is released before the seat has the reached the programmed position, it will stop as a safety precaution.
| pg. 2:5 Rear-/side-view mirrors, Vanity mirrors |
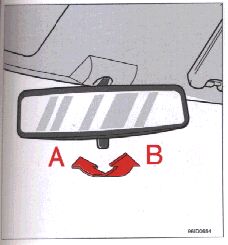
Rear-view mirror
A
Normal position
B
Night position, reduces glare from following headlights
CAUTION: Never use ice scrapers made of metal as they can easily scratch the mirror surface. |
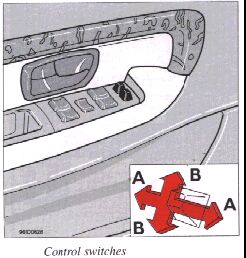
Electrically-operated side-view mirrors
The control switches are located in the driver's door armrest.
A
Adjustment sideways
B
Adjustment up/down
WARNING!
Objects seen in the wide-angle right side-view mirror are closer than they appear to be.
|
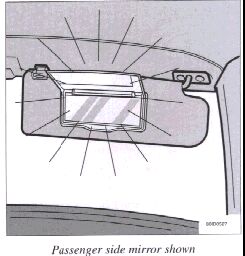
Vanity mirrors
The vanity mirrors are located on both front sun visors.
The lamps light up when the covers are opened.