| pg. 1:17 Audio system CR-915, general description |
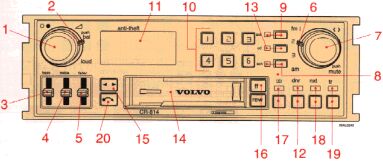
The following 21 pages describe the use of your CR-814 cassette radio and CD remote control. See page 1:44 for specifications. See page 1:33 for information on the CR-718 cassette radio.

1.
CD
=applicable only when set is in
CD mode and connected to a CD changer
| pg. 1:18 Anti-theft code |
The radio features anti-theft circuitry. While the unit is powered but the ignition is OFF (key removed), the "CD" indicator lamp (13) flashes to indicate the anti-theft system. If the set is removed from the vehicle or if the battery power is disconnected, a special code must be entered to enable operation of the set.
Refer to the radio code card supplied with your vehicle or ask your dealer for the correct code or askyour dealer for the correct code .
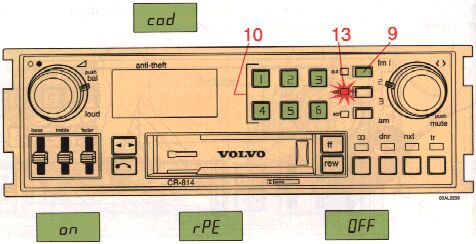
To enter the code
When the set has been disconnected from power the set displays "cod" after being switched on. the "cd" indicator lamp (13) flashes. Enter the 6-digit code using the preset buttons (10). Please note that only 4 digits will be seen in the display. Press the "aut" button (9). Do not press "aut" until you have entered the correct code. If the correct code is entered "on" is displayed and the set is now ready for use. If you enter an incorrect code you must enter the correct code from the beginning again.
Incorrect code
If an incorrect code is entered "rpE" is displayed. Enter the correct code.
Once you have attempted to enter an incorrect code three times the set will lock and remains locked for 1 hour.
"OFF" is displayed.
The unit must be connected and turned on during this time.
Enter the code again once this time has elapsed.
| pg. 1:19 Radio |
On/off switch and volume control
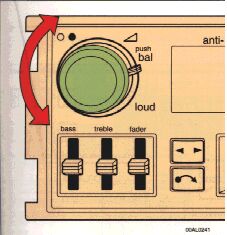
Turn the button clockwise to switch on and to increase the volume.
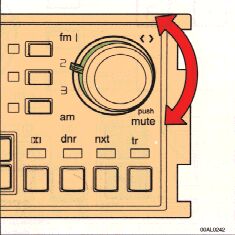
Waveband selector
The desired waveband is set by turning the inner knob. The set waveband and frequency is displayed. NOTE! There are three FM positions and one AM position which make it possible to store 3 x 6 FM stations and 6 AM stations.
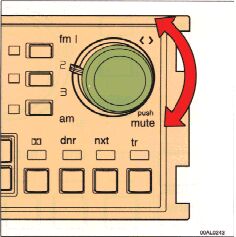
Manual tuning
Turn the outer knob counter-clockwise to tune to lower frequencies and clockwise to tune to higher frequencies. The tuned frequency is displayed.
| pg. 1:20 Radio |
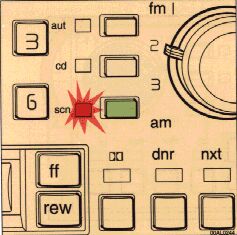
Scan tuning
Depress the "scn" button. The radio scans the entire waveband and stops at every audible station for 8 seconds. Scanning is then resumed. If you want to retain the station press the "scn" button a second time within the 8 seconds.
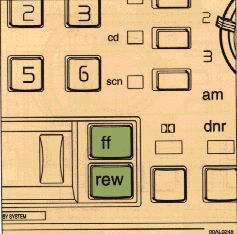
Seek tuning
Depress the "ff" button to seek for higher frequencies and "rew" to seek for lower frequencies. The radio seeks the next audible station and stops there. If you wish to continue the seek tuning press the "ff" or "rew" button once more.
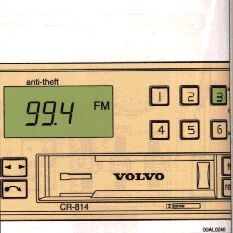
Preset programming
1. Tune to the desired frequency.
2. Depress and hold a preset button. The audio will cut out. Keep the button depressed until the audio comes on again (approx 2 seconds).
3. The frequency is now stored on this preset button.
| pg. 1:21 Radio (cont.) |
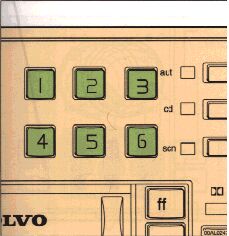
Preset buttons
Depress the preset button to tune in to the programmed frequency. The set frequency is displayed.
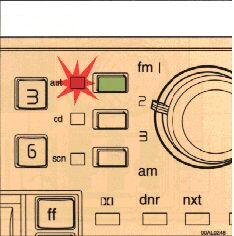
Automatic programming
(Autostore )
(Automatically seeks and stores up to 6 strong AM or FM stations)
This feature works on both wavebands, but if you change waveband and use the autostore function on this new waveband, the autostored stations on the previous waveband will be cancelled. The antenna must be fully extended when using this function.
1. Depress and hold the "aut"button for at least 1 second. The indicator lamp is lit. A number of strong stations (maximum six) on the chosen waveband are now automatically stored in the memory. The lowest frequency is heard. If there are no audible stations, "no" is displayed.
2. Press the "aut" button to obtain another autostored station. A new station will be selected each time the "aut" button is pressed.
| pg. 1:22 Radio (cont.) |
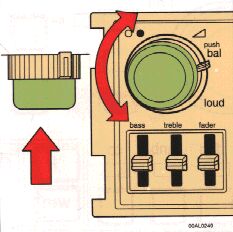
Balance control
Depress the control knob and turn clockwise/counter-clockwise to adjust right/left speaker balance. A "detent" indicates the "equalized" left/right balance position.
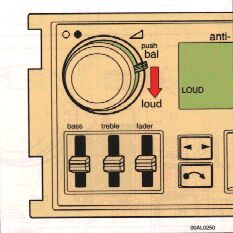
LOUDNESS selector
When "Loudness" is engaged, bass and treble are enhanced at low volumes.
"LOUD" is displayed when this function is engaged.
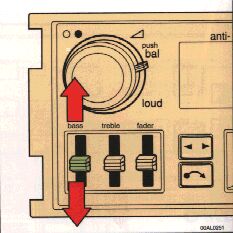
Bass control
Adjust the bass by sliding the control up or down.
(Up to increase, down to decrease. The "detent" indicates "equalized" bass.)
| pg. 1:23 Radio (cont.) |
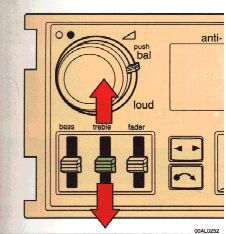
Treble control
Adjust the treble by sliding the control up or down.
(Up to increase, down to decrease. The "detent" indicates "equalized" treble.)
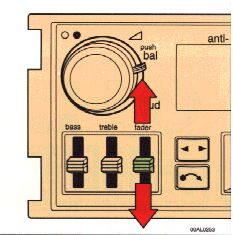
Fader control
Adjust front/rear speaker balance by sliding the control up or down.
(Up to direct more sound to the front speakers, down to direct more sound to the rear speakers. The "detent" indicates "equalized" front/rear balance position.)
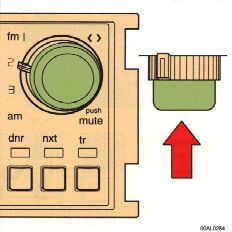
Mute function
Press the tuning knob to temporarily mute the sound. "PAU" is displayed.
| pg. 1:24 Radio (cont.) |
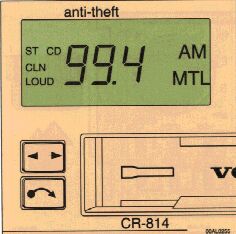
Display
The display shows the set waveband (AM, FM) radio frequency, ST (stereo) LOUD (loudness), tape direction, compact disc number and track number when these functions are engaged.